
Models, actresses, and celebrities (such as Jennifer Lopez and Kim Kardashian) are frequently exalted for their beautiful, chiseled faces. But did you know that many of these gorgeous women rely on beauty secrets (like makeup contouring) to create the illusion of a thinner, more sculpted face? This easy to follow beauty tutorial shows you how to do makeup contouring in three steps.
Makeup Contouring In 3 Easy Steps:
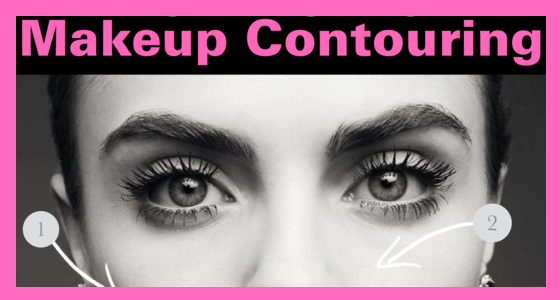
1. Highlight
Before using foundation, apply concealer to your face in the following areas: in an upside-down triangle shape underneath your eyes, along the bridge of your nose, and above the cupid’s bow of your mouth. This will act as a highlighter for your face, which enables the natural light to bounce off those areas, making them more prominent. For an added hint of luminescence, swipe on a small amount of highlighter onto the ridge of your cheekbones and on your brow bone. This will help catch the light, creating a dewy, radiant look.

2. Contour
After applying concealer and foundation, using a matte bronzer or contouring powder (about two shades darker than your foundation color), sweep this darker color across the hollows of your cheeks (it helps to suck-in your cheeks while doing this). Then sweep the bronzer below your jawline, under your chin, and along the perimeter of your forehead. This helps make these areas appear to recede, creating a more chiseled, defined look to your cheekbones and jawline. If you want to minimize the appearance of your nose, you can also use a small brush to dust the contouring powder down the sides of your nose (which makes it appear more narrow) and underneath the tip of your nose (making it look shorter).
3. Blush
Make sure to thoroughly blend all the face makeup (concealer, foundation, bronzer or contouring powder) you’ve just applied with a makeup brush. As a final touch, sweep blush onto the apples of your cheeks. This helps bring the whole look together. Voila! In three easy steps, you’ve created the look of a thinner, more sculpted face by using makeup contouring techniques.
Below is a diagram showing Kim Kardashian using highlighting and contouring makeup.
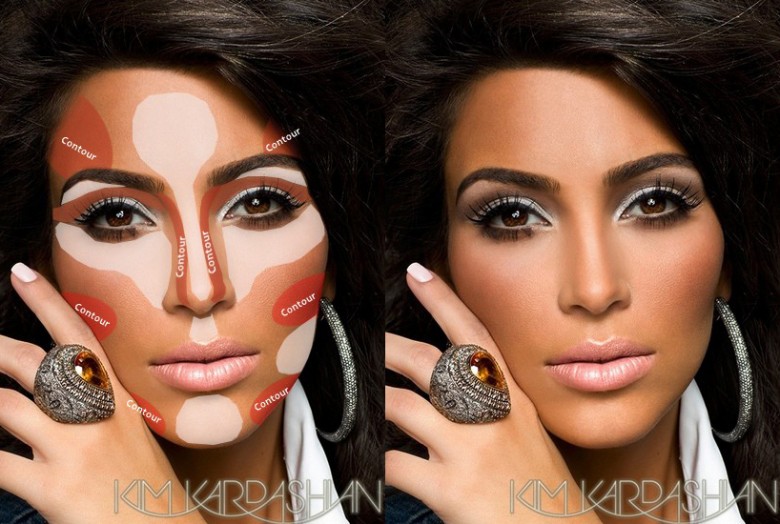
[Image Credit: Kim Kardashian]
Love this post? Want to stay updated? Follow Inspirations & Celebrations for more fabulous content!


Scott says:
Hi Christina.
You mention concealer & foundation, but where do you apply the foundation?
Thank you.
Christina-Lauren says:
Hi! Apply the foundation all-over your face, as usual. Then follow with a bronzer or contouring powder to shade/darken specific areas (under the jawline, in the hollows of your cheeks, etc.). The foundation simply evens out skin-tone, it’s not meant to contour/highlight. That’s what the concealer and bronzer/contouring powder are for.
blaine says:
can we put some water to the contouring makeup powder?
Christina-Lauren says:
Hi Blaine! Some makeup is developed to be a wet-to-dry formula (but check the packaging first). To do this, wet your brush with a setting spray (like Urban Decay Long-Lasting Mist) rather than water, then dip the brush directly into the makeup. After you’re done, thoroughly clean your brush with gentle soap and water. The setting spray will help the makeup last longer throughout the day.
SAM says:
DO YOU DO EYE MAKE UP BEFORE OR AFTER ? X
Christina-Lauren says:
Hi Sam! Apply your face makeup prior to eye makeup. The only exception is under eye concealer, which can be applied before or after you do eye makeup (this is a matter of personal preference). Some makeup artists recommend doing that at the end, so that you can remove any flecks of mascara or smudges.
Breanna says:
hey what are some additional steps you can take to prevent oiliness ….
Christina-Lauren says:
Hi Breanna! Whenever you do makeup contouring, I recommend using an oil-free moisturizer first, and then applying a makeup primer on top of that. Both products will help minimize oiliness.
ogechi doris says:
I really appreciate,d contouring tin has always been a problem 2 me but now I can do it on my own.
Christina-Lauren says:
Great to hear this helped you!
lanae says:
any ideas for contouring with darker skin girls because i dont use bronzers or blushes . help me please. and how do you make the bridge of your nose fuller. thanks for your time
Christina-Lauren says:
Hi Lanae! I would recommend using a darker shade of foundation than you normally do (for the ‘contouring’ parts of your face). Make sure to thoroughly blend in the 2 foundation shades, so that no noticeable lines of demarcation show.
maerigracia says:
Thanks for sharing this,such a helpful article.
Christina-Lauren says:
Happy to hear this helped you!
anngelik says:
Thank you for your advise on this post! I will definitely try this out!
-Vogue&Heels
vogueandheels.com
Christina-Lauren says:
So welcome!
Bellashoot Bellas says:
We found you article on bellashoot.com and really enjoyed reading your tutorial. We think our users would really love your work. Feel free to check us out. xo
caroline says:
This is so awesome! I really admire how they manage to completely transform themselves with just some contouring.
xo
girlintheyellowdress.com
Christina-Lauren says:
Isn’t it amazing?! Makeup contouring especially makes a noticeable difference in photos.