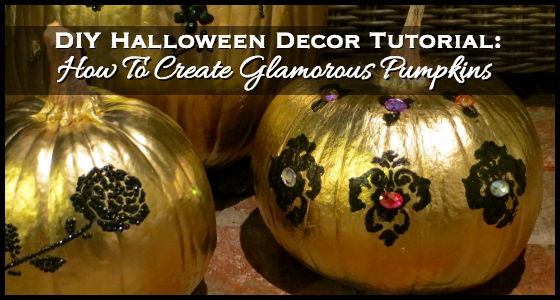
While many Halloween decorations are often childish or scary, if you prefer chic, stylish Halloween decorations, this is the DIY tutorial for you. This easy-to-follow DIY Halloween Decor Tutorial shows how to create eye-catching metallic gold, rhinestone bedazzled glamorous pumpkins in a few simple steps.
How To Create Glamorous Pumpkins:
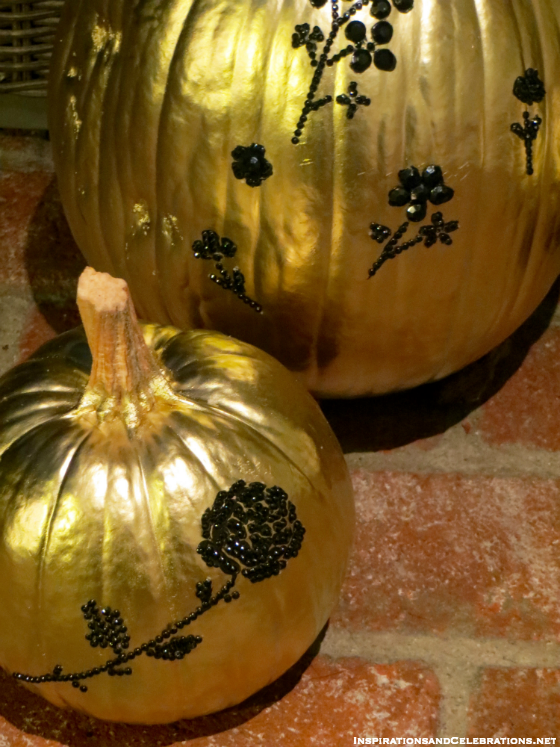
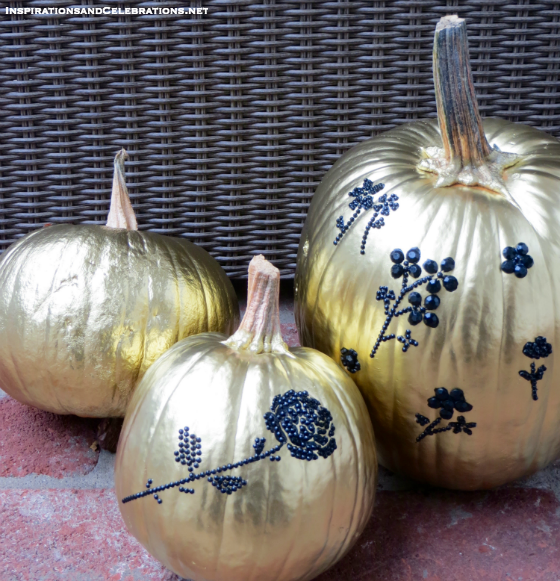
Ideal for entertaining or just when you want to enhance the look of your home during Halloween, these gorgeous gilded and rhinestone-encrusted pumpkins instantly add a luxurious touch, but cost less than $50 to create. Since the mega-watt, high-shine metallic finish on these glamorous pumpkins has a dramatic, reflective appearance (when displayed under incandescent lighting at night), they make the perfect Halloween decor for outdoor or evening entertaining. Plus, the sparkly rhinestones add a stylish element of embellishment, making these glamorous pumpkins a true decor statement.
Supplies To Create Glamorous Pumpkins:
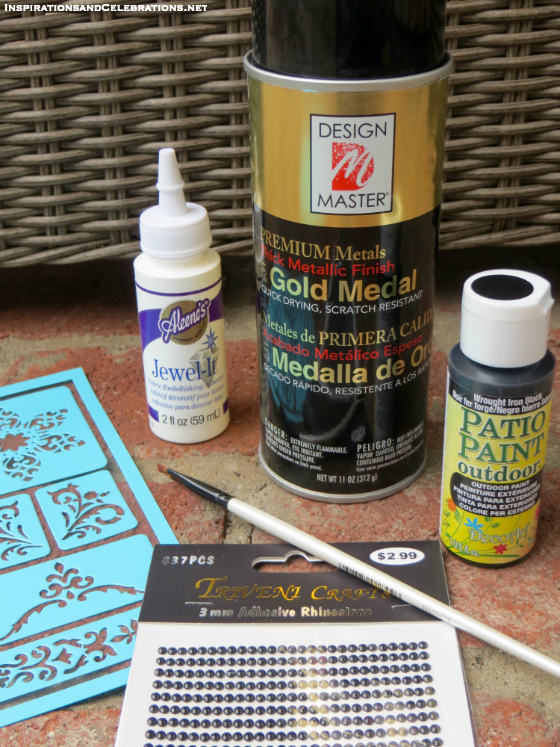
For less than $50, you can create these stunning metallic gold, rhinestone bedazzled pumpkins. Here are the supplies you will need.
1. 3 Pumpkins (in various sizes)
7. Jewel Glue
In addition, to make the project easier and faster, you can use tweezers (for adhering the rhinestones).
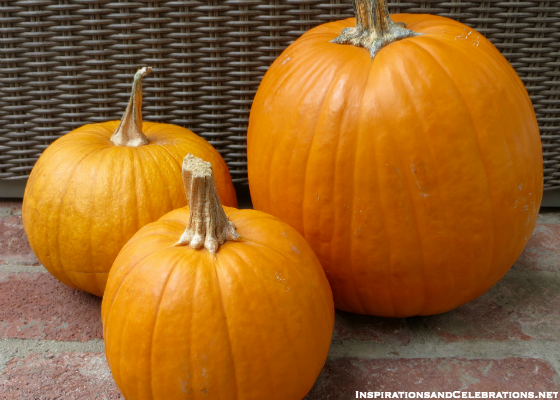
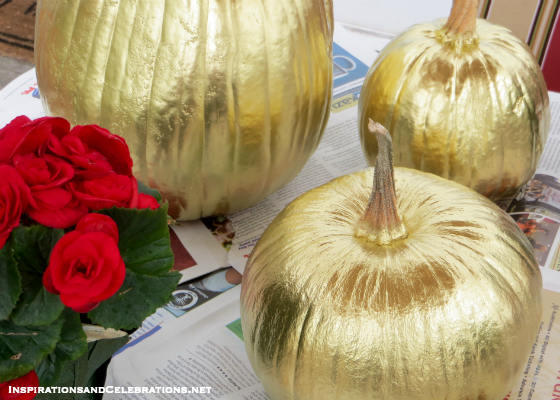
When choosing your pumpkins, it’s advisable to opt for various sized versions. This creates a visually-interesting display, and enables you to use different types of stencils for variety. Look for pumpkins with minimal scratches or indentations, as it will make the stenciling process easier.
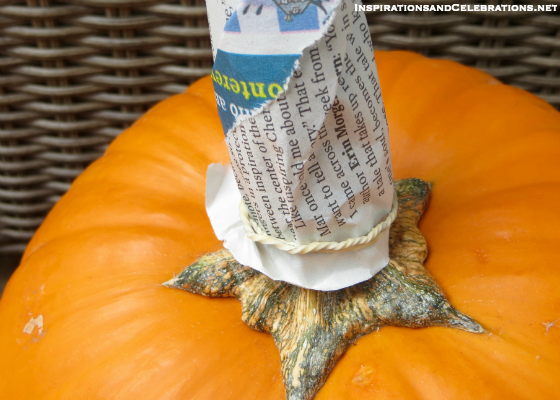
Before starting the project, use old newspaper to wrap the handle of each pumpkin, and tie securely with a rubber band. This will enable you to handle and move the pumpkin, without getting spray paint all over your hands.
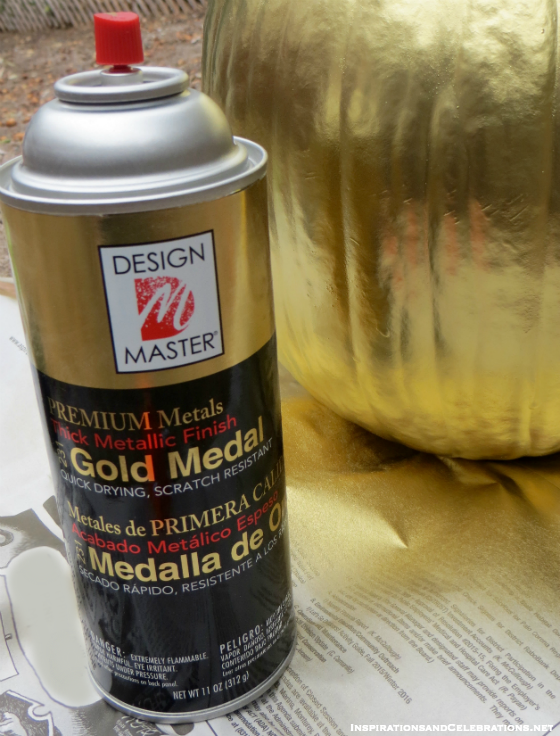
In an outdoor area, place old newspaper on the ground (it’s best to do this part of the project far away from any valuables like patio furniture or plants). Shake the can of spray paint before using. Then spray the pumpkins at a distance of about 10 inches, making sure to evenly coat the surface of the pumpkin. There should be no visible pumpkin skin showing. You can use 1-2 coats of spray paint, depending on your preference.
After spray painting each pumpkin, transfer it to a flat surface (covered in old newspaper) to dry. Allow the pumpkins to dry thoroughly; a fast-drying spray paint could take a few hours, at most. To speed up the process, you can place an electric fan near the pumpkins.
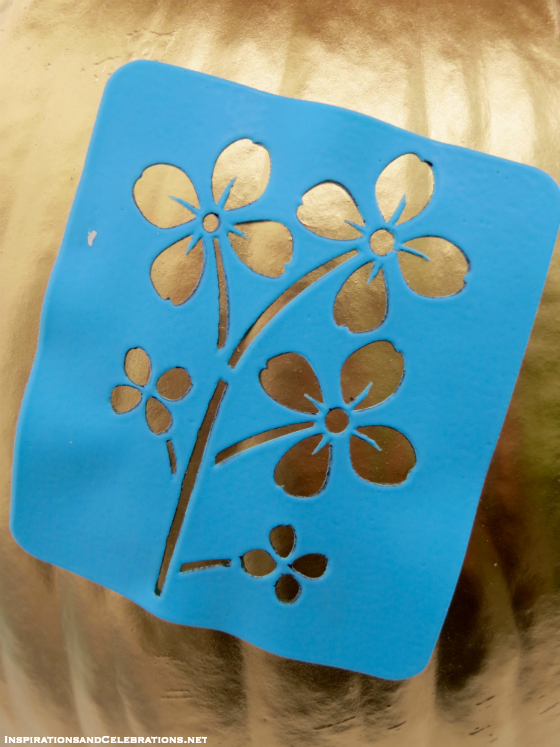
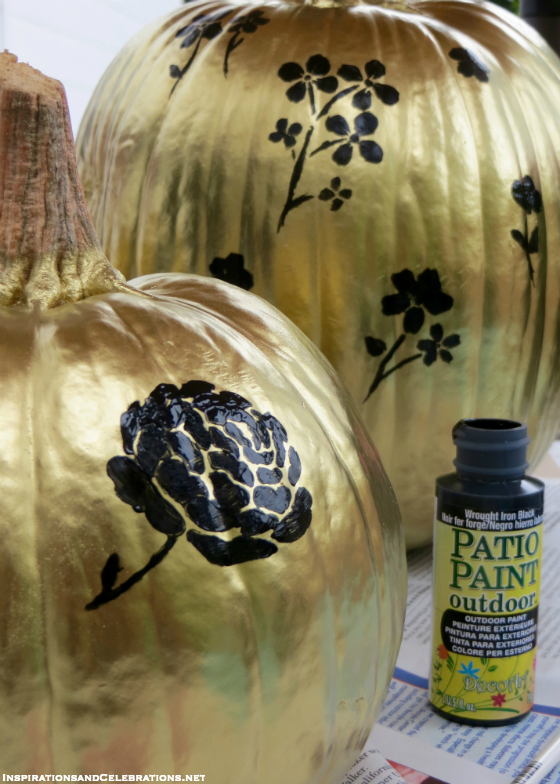
When the pumpkins have thoroughly dried, adhere the self-adhesive stencil (in the design of your choice) on the pumpkin. Make sure the edges of the stencil are completely stuck to the pumpkin to create a clean design (or the design will turn out messy looking after painting).
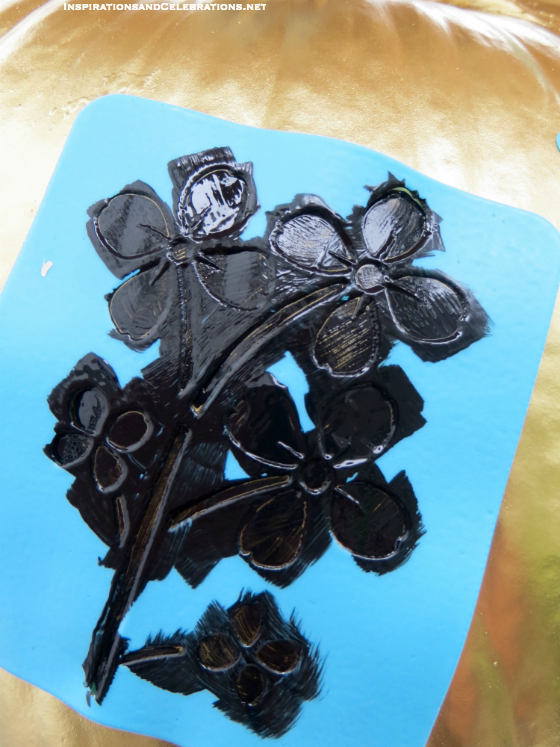
Using the outdoor patio paint and flat tip paint brush, lightly paint the exposed areas of the stencil. You only need 1 coat of paint, as this will act as the guideline for your design (which will be rhinestoned afterwards). After about 10 minutes, gently lift off the stencil.
Allow the painted designs to fully dry before adhering rhinestones. Depending on the type of paint you use, it could take about 1 hour. Lightly touch a small part of the design with your finger to see if it’s dry.
Using your fingers (or tweezers, for more precision), start bedazzling your pumpkin by adhering rhinestones on top of the painted designs. For additional sticking power, use a small amount of glue on the backside of each rhinestone before adhering to the surface of the pumpkin. The glue should be intended for jewels, and dry clear.
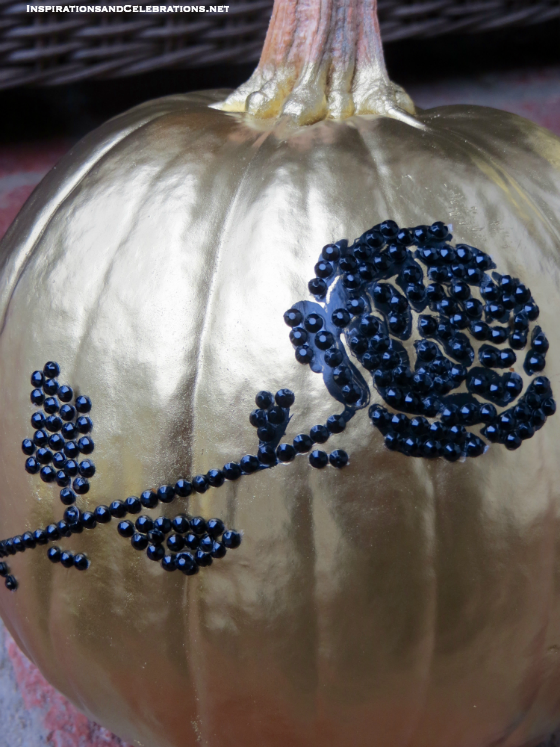
The rhinestones will ideally cover the paint, using the paint as a background for added drama and dimension. You can opt for rhinestones in the same color as the paint (as shown above), or choose bright colored rhinestones that contrast with the paint. Be as creative as you like! What’s wonderful about these glamorous pumpkins is that they look especially beautiful at night, when they catch the light.