This tutorial is brought to you in partnership with Creative Balloons Manufacturing.
Whether you’re hosting a Valentine’s Day party, a birthday celebration or a baby shower, a whimsical way to decorate your party is with a balloon garland. The best part is – making a balloon garland is both fun and easy!
In today’s DIY guide, learn step-by-step how to create a DIY Balloon Garland.

This might surprise you to learn, but I was raised in a global balloon & party supply business. As the Business Manager for family’s 45-year old manufacturing and wholesaling company, Creative Balloons Mfg., balloons and celebrations have always been a part of my everyday life.
The most inspiring part of my role is using our products to decorate for special celebrations. As a creative person, I’ve always loved fun DIY projects, especially enchanting party decorations. That’s why I was excited to create this DIY Balloon Garland Tutorial using Celebrity Balloons (which are exclusively available from Creative Balloons Mfg. on Amazon).
DIY Balloon Garland Tutorial
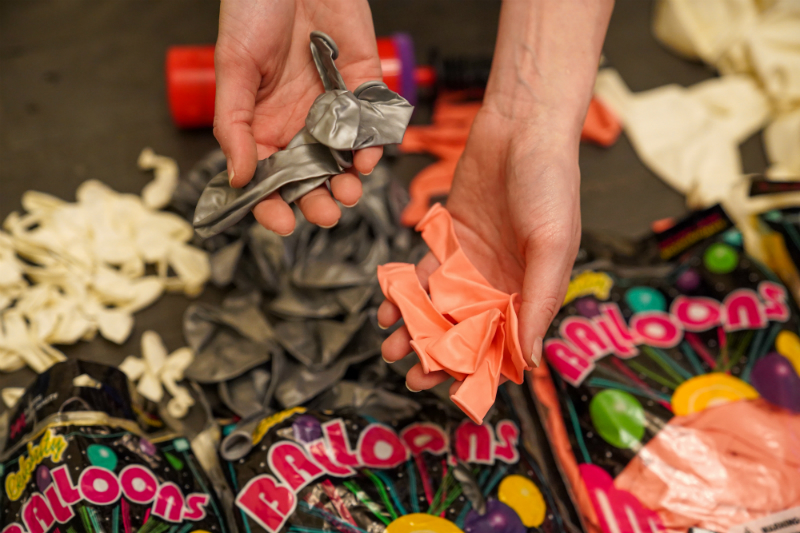
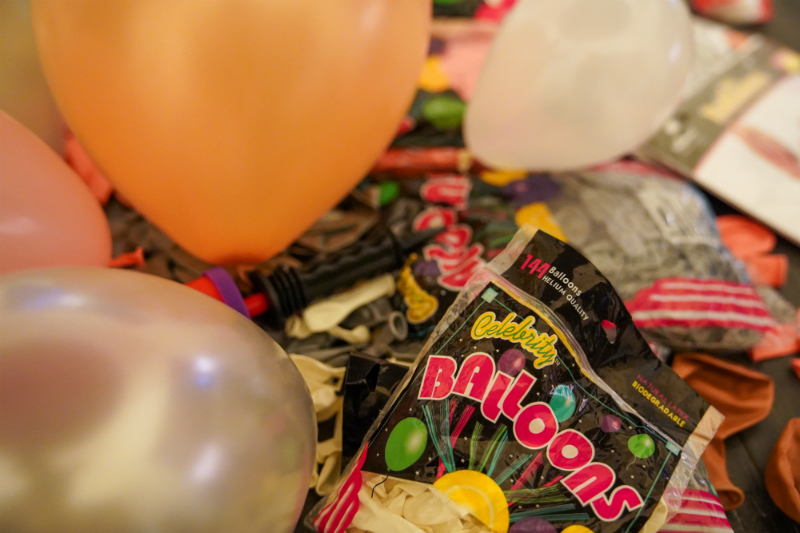
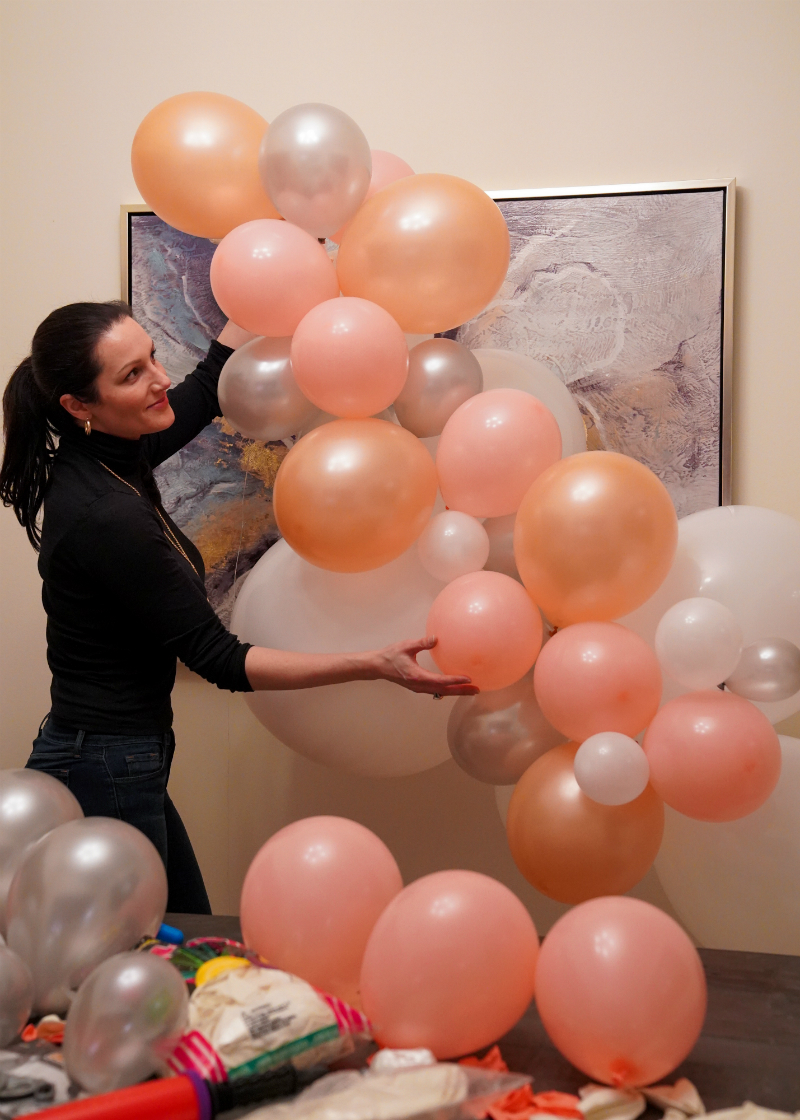
Step 1: Shop for Celebrity Balloons on Amazon from Creative Balloons Mfg. in a variety of different colors and sizes. When creating a DIY Balloon Garland, I recommend using mini 5″, 9″, 12″, 16″, and jumbo 36″ balloons. This will create the most eye-catching and “organic-looking” balloon garland.
Pro Tip: This line of balloons is durable enough for use in a balloon garland (or other types of balloon installations). That’s why balloon decorators and party pros use Celebrity Balloons from Creative Balloons Mfg.
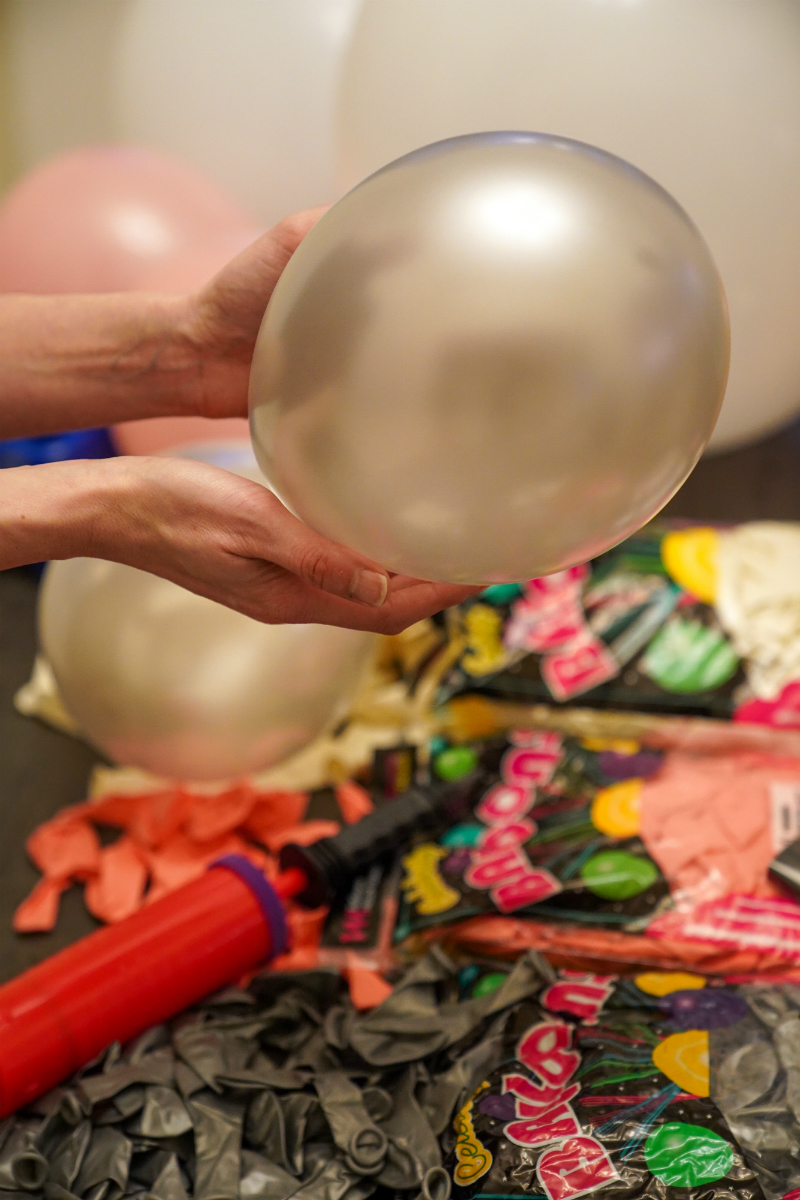
Step 2: Inflate balloons with air using a hand pump inflator (for mini and standard sized balloons) and an electric air inflator (for large balloons). Tie a knot in the neck of each balloon.
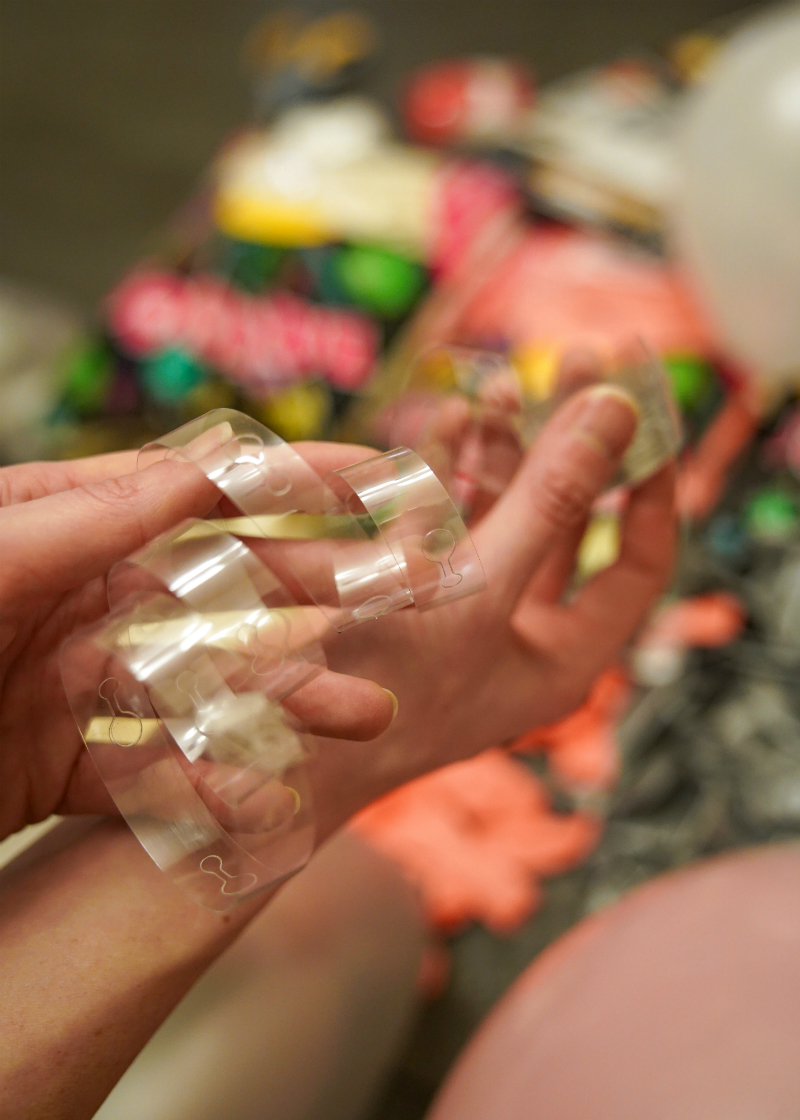
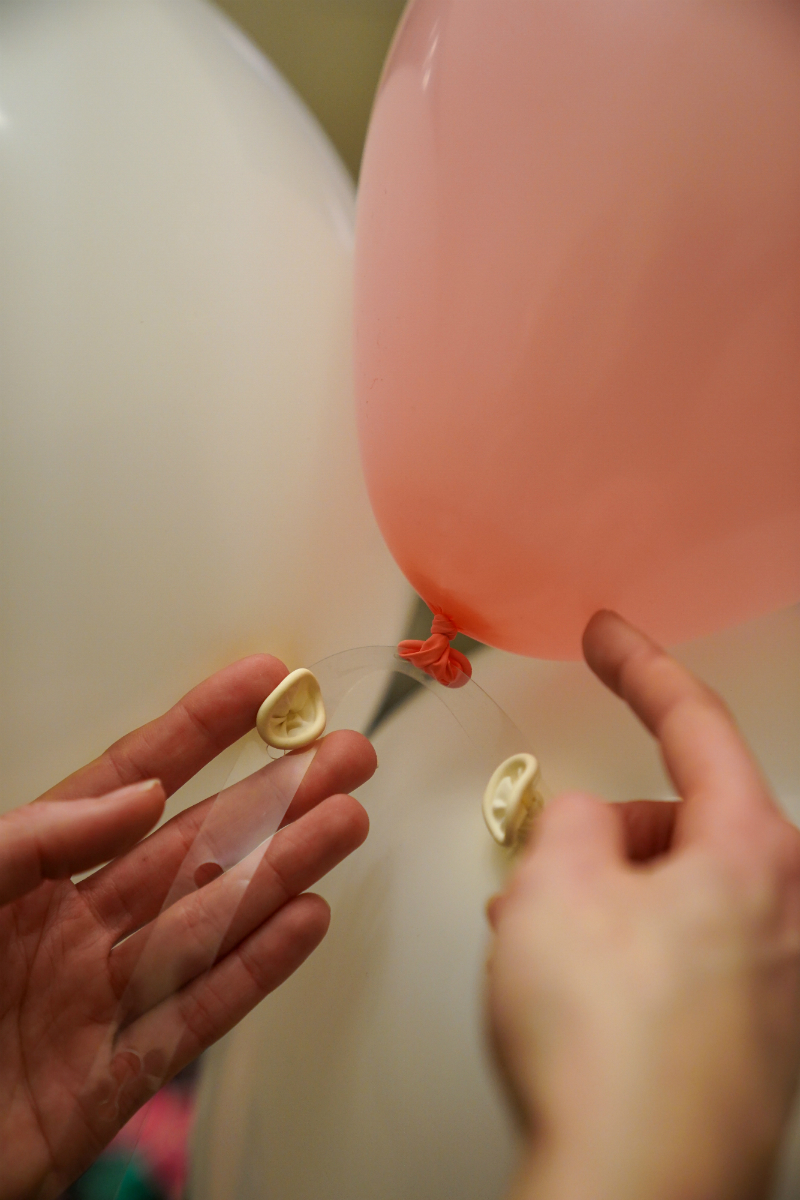
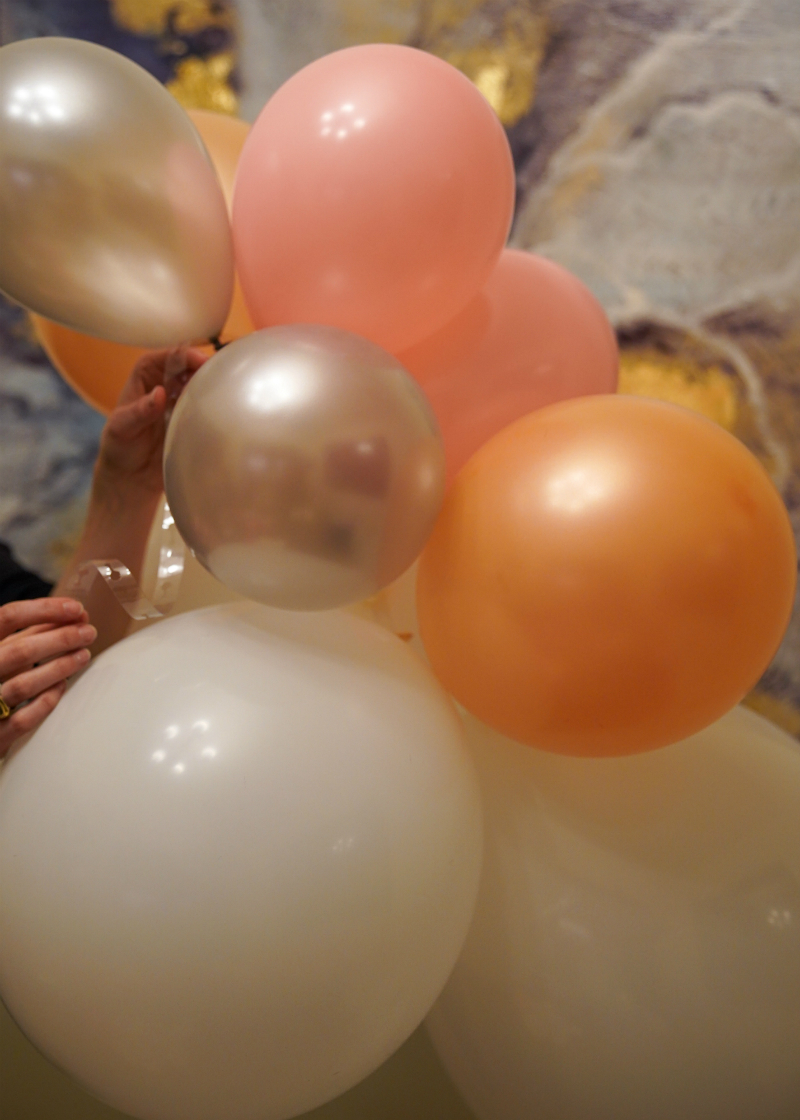
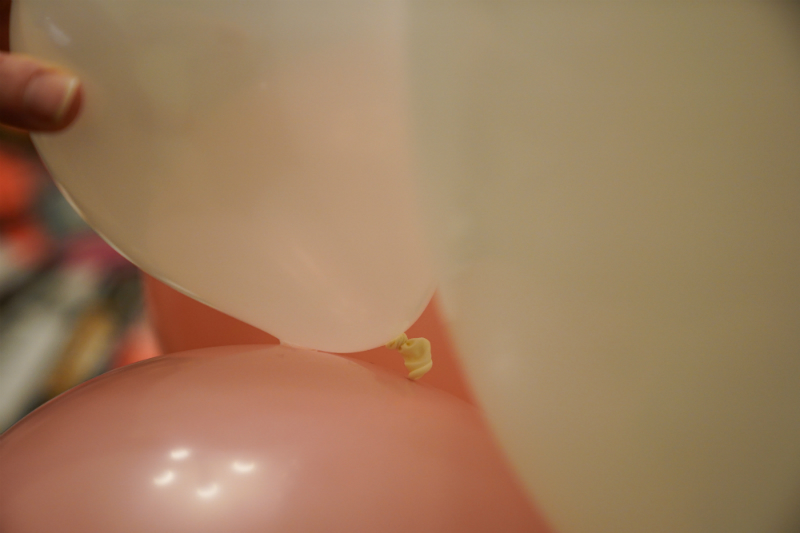
Step 3: Using a clear balloon decorating strip, attach the neck of the balloon to the strip. Start by attaching the regular sized latex balloons (9″ and 12″) and the large balloons (16″ and 36″). Vary by size and color as you go up the strip. Note: The 5″ mini balloons will be attached later.
Pro Tip: As you’re creating the DIY Balloon Garland, I recommend stepping back to get a full view of the garland. This will help you better visualize which balloon colors and sizes to use. There’s no exact formula – the more creative you are, the better. Modern balloon garlands have a natural, unstructured appearance.
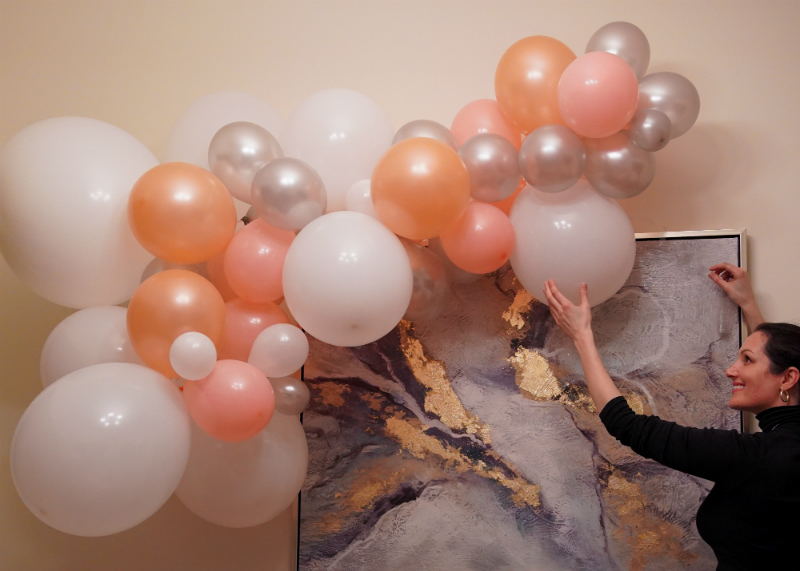
Step 4: When the majority of your balloon garland is done, then it’s time to fill in blank spaces with the 5″ mini balloons. To make this step easier for you, instead of using a low-temp hot glue gun (which most tutorials would suggest), I recommend using glue dots. Attach the mini balloons to the balloon garland by adhering it with a glue dot and securely pressing the two balloons together.
Step 5: When the DIY Balloon Garland is complete, attach a few removable, self-adhesive hooks to the wall. Attach string to the balloon garland to hang on the hooks. When the party is over, you can simply remove the balloon garland and hooks without damaging the wall.
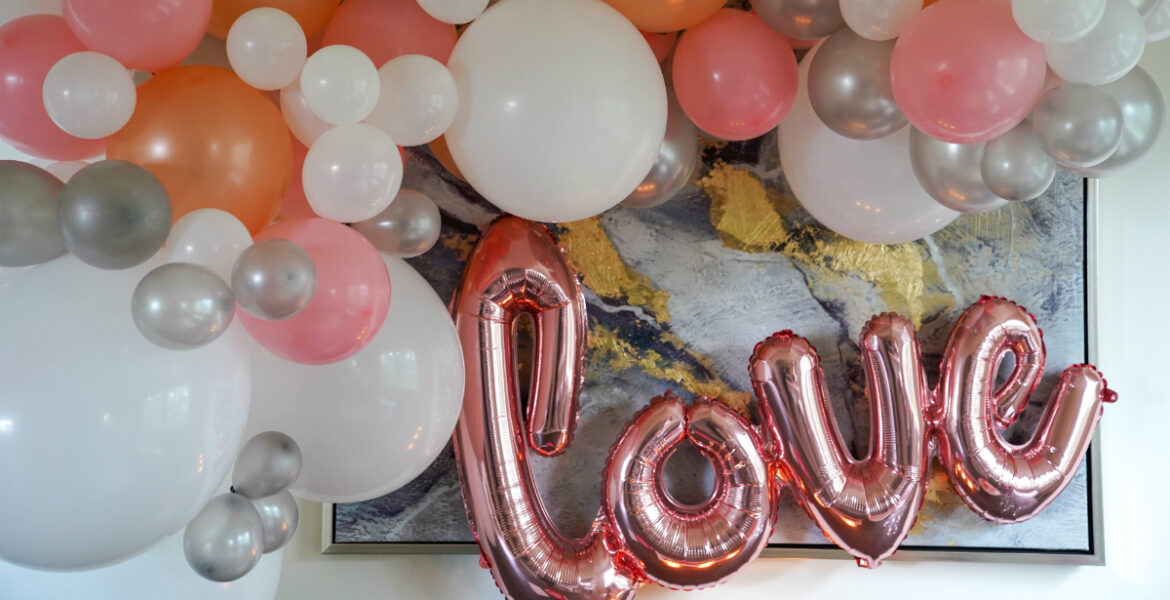
Optional: Another current trend in party balloons is the use of letter-shaped foil balloons. As shown above, a Love script foil balloon was affixed underneath the balloon garland. This created a cohesive backdrop for the Valentine’s Day celebration featured here. You can use different letter and number shaped foil balloons to create any type of message – ranging from I DO to BABY, depending on the type of party you’re hosting.
When shopping for latex balloons, look for the Creative Balloons Mfg. line on Amazon. For more fun DIY tutorials and ideas, check out the Entertaining section on Inspirations & Celebrations.
Shop The Guide:

Wat r the charges