This shop has been compensated by Collective Bias, Inc. and its advertiser. All opinions are mine alone. #SallyStrong #CollectiveBias
For a polished, pulled-together look, a fresh manicure is always the ultimate finishing touch. Aside from neutral hues and bold reds, a classic style for your nails is a simple and sophisticated French Manicure.
If you want to put a modern spin on this traditional nail look, in today’s DIY beauty tutorial you’ll learn how to easily do a glam gold French Manicure at home in just a few steps.
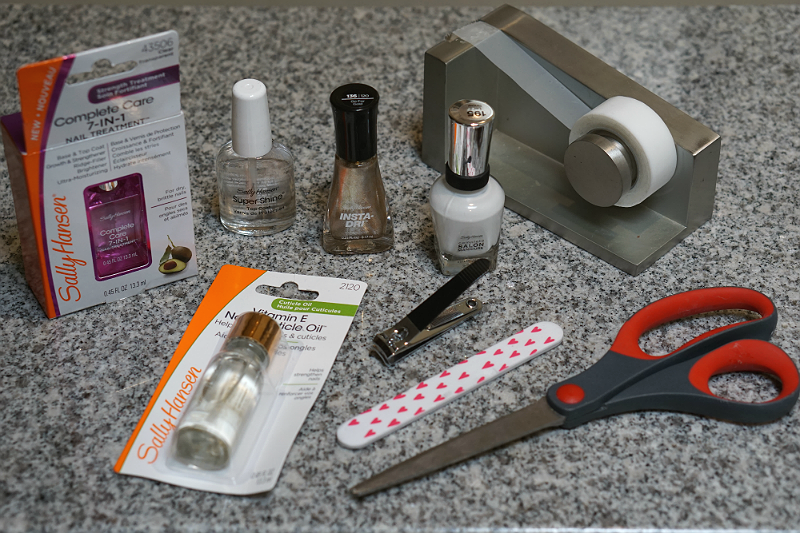
DIY Modern Glam Gold French Manicure Supplies:
- Tape
- Scissors (optional)
- Nail Clippers
- Nail File
- Sally Hansen Complete Care 7-in-1 Nail Treatment
- Sally Hansen Vitamin E Nail & Cuticle Oil
- Sally Hansen Complete Salon Manicure (in Let’s Snow)
- Sally Hansen Insta-Dri Nail Color (in Go For Gold)
- Sally Hansen Super Shine Top Coat (optional)
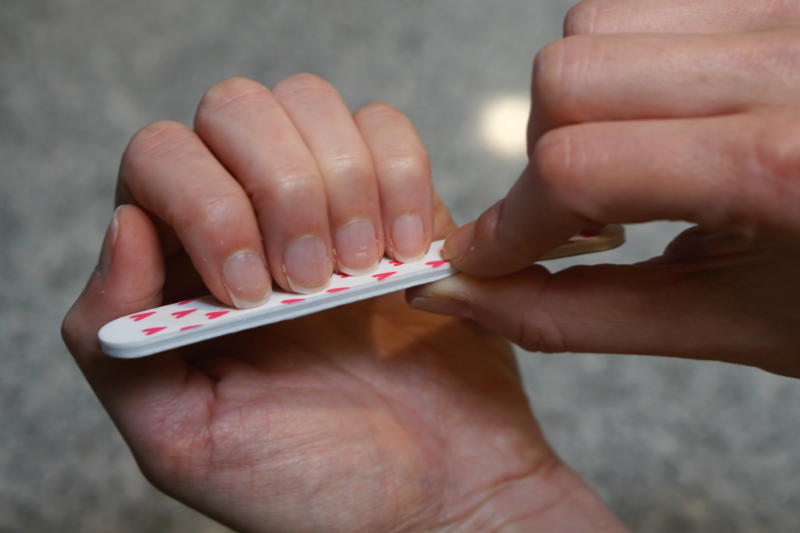
Step 1: To start with – nails look more contemporary when they are cut shorter and squared off (rather than having an elongated, almond shape). Using nail clippers, trim your nails and file to smooth the edges.
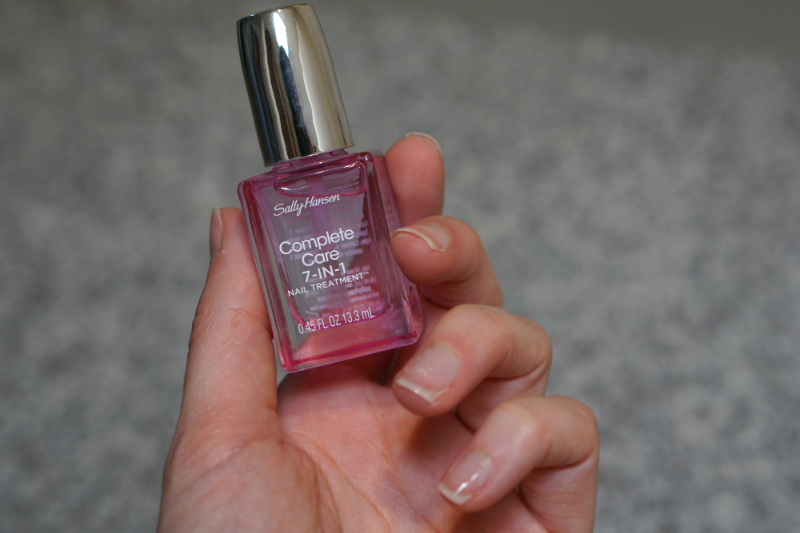
Step 2: To protect, strengthen, and increase the longevity of your manicure, apply the Sally Hansen Complete Care 7-in-1 Nail Treatment as a base coat. Not only does this beauty-boosting base coat help nail polish adhere better (making your manicure last longer), since it contains essential nutrients (like Avocado Oil, Pomegranate Extract, and Calcium), it can help “restore dry, brittle nails making them visibly healthier looking and beautiful.” Only 1 coat is needed as the base coat. Just allow to dry thoroughly (a few minutes) before proceeding to Step 3.
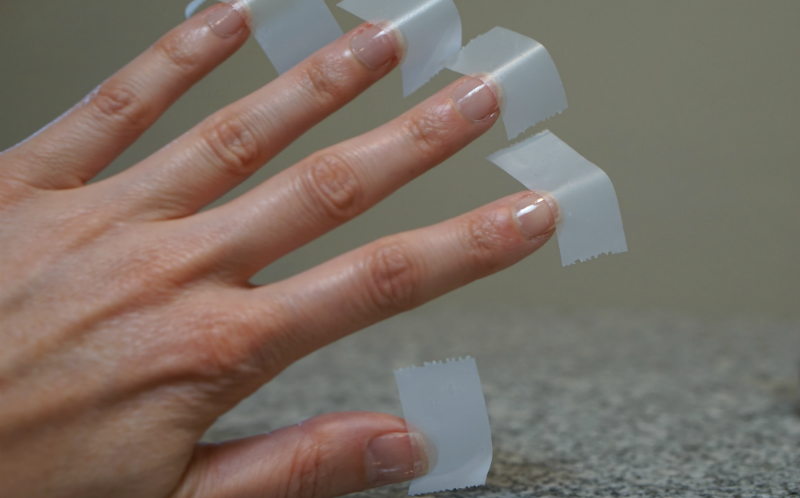
Step 3: Trim small pieces of tape and adhere each piece to the tips of your nails. Gently press the tape down, ensuring no air pockets pop up. This will help you create a clean line, which will act as your guide for the white tip.

Step 4: Apply a coat of gold nail polish (a good one is Sally Hansen Insta-Dri Nail Color, as it has a sparkly gold finish and dries in just 60-seconds) to the exposed part of your nail. It’s ok if polish gets onto the tape strips. Allow this coat of polish to completely dry (about 2 minutes, just to be safe) before slowly removing the tape strips.
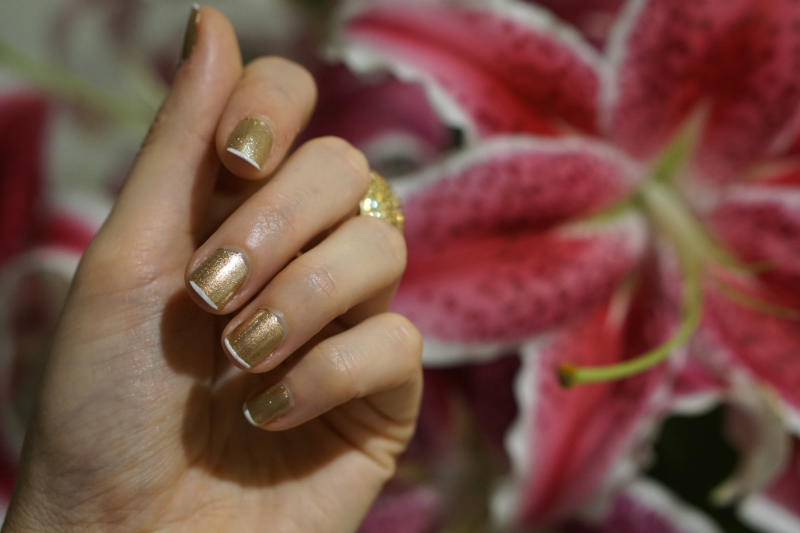
Step 5: Carefully swipe on a thin coat of white nail polish on the tips of your nails (which are now exposed, since the tape strips covered them). Allow the white nail polish to dry before applying the Sally Hansen Complete Care 7-in-1 Nail Treatment (or Sally Hansen Super Shine Top Coat) to your nails.
To keep your manicure looking great for days, re-apply 1 coat as needed (to keep your manicure looking glossy and chip-free), and use the emollient-rich Sally Hansen Vitamin E Nail & Cuticle Oil moisturizing treatment (to keep your nails and cuticles in tip-top shape).
What’s great about the Sally Hansen Complete Care 7-in-1 Nail Treatment is that it’s everything you need, all in one little bottle. This multi-purpose nail treatment acts as your Base Coat, Top Coat, Growth Treatment, Strengthener, Ridge-Filler, Brightener, and Ultra-Moisturizing Nail Treatment.

Instead of running to a nail salon to get a modern glam French Manicure, save your money and time by heading to your nearest CVS (as pictured above), Walmart, Target, Walgreens, or Rite Aid to shop for Sally Hansen products in the Beauty Section.
After doing your own modern glam French Manicure, show-off your gorgeous manicure by sharing pics of your pretty polish on social media and using the hashtag #SallyStrong.


