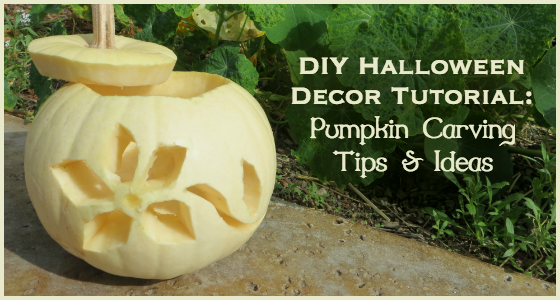
If you love DIY holiday projects, this easy-to-follow Halloween Tutorial shares genius pumpkin carving tips and ideas to help you create a fabulous Jack-O-Lantern.
Thanks to the team at Earthbound Farms in Carmel Valley, California, their expert tips shared below will make you look like a pro, even if this is the first time you’ve ever carved a pumpkin. If you’ve ever been daunted by pumpkin carving (due to the sloppy mess or challenging carving process), then this tutorial will teach you the secrets of folks who’ve mastered the art of pumpkin carving.
Pumpkin Carving Tips & Ideas
To carve a perfect pumpkin, below are the tools and supplies you’ll need for this simple project. If you’re doing this DIY project with kids, make sure to use child-safe tools instead of sharp knives.
PUMPKIN CARVING SUPPLIES:
1. Medium or Large Pumpkin
2. Chalk Marker
3. Paring Knife or Pumpkin Carving Tool
4. Circle Hoe or Garden Weeder
PUMPKIN CARVING STEPS:
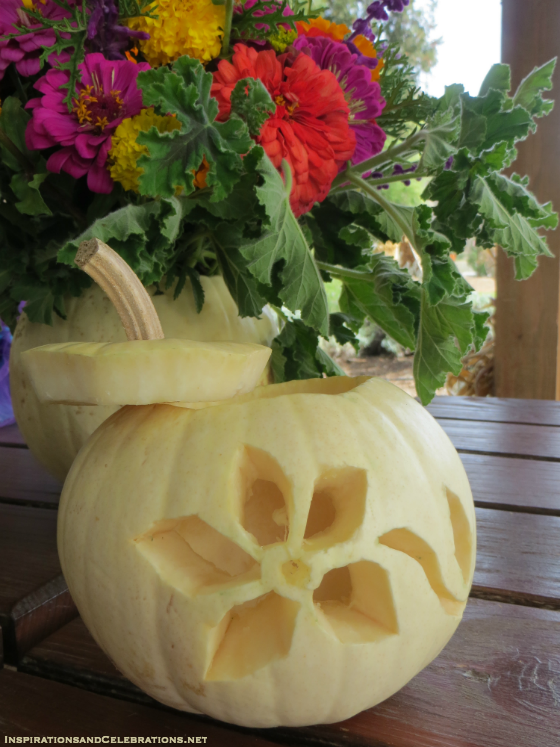
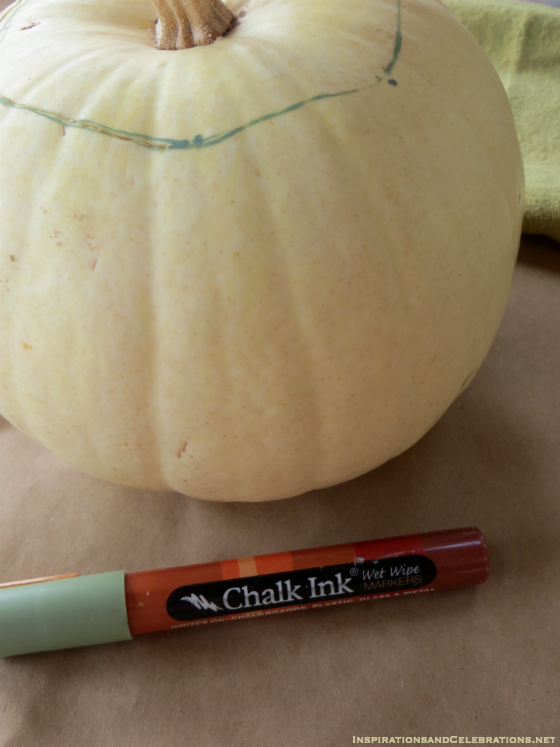
STEP 1: You’ll need to cut a circular hole in the top of your pumpkin to create a lid. An easy way to create a perfect circle is to use a ruler to measure with, using the stem of the pumpkin as your placeholder, and measuring out a few inches. Mark each spot by creating a dot using a chalk marker (which can easily be cleaned-off with a damp rag). Draw a line between the dots, and continue this process until you’ve drawn a full circle.
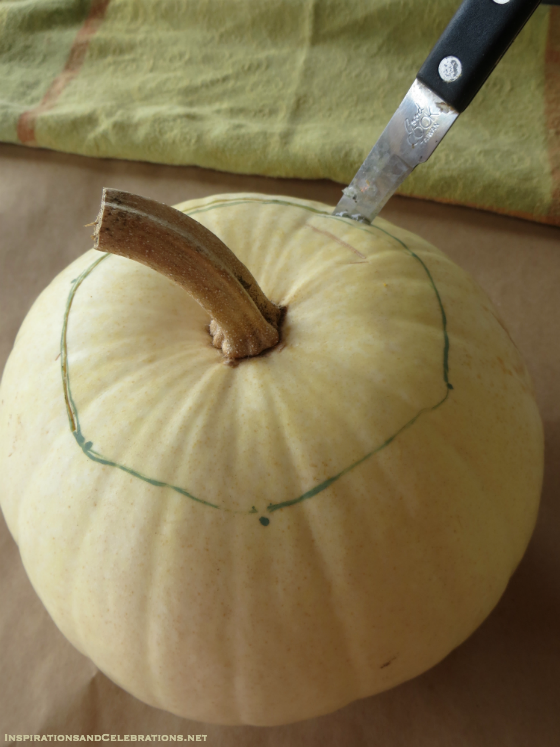
STEP 2: Using a paring knife or pumpkin carving tool, carefully cut out the top lid, following the line you drew with the chalk marker. To make sure your lid will go back onto the pumpkin (and now fall through), cut the lid at an angle instead of directly straight down.
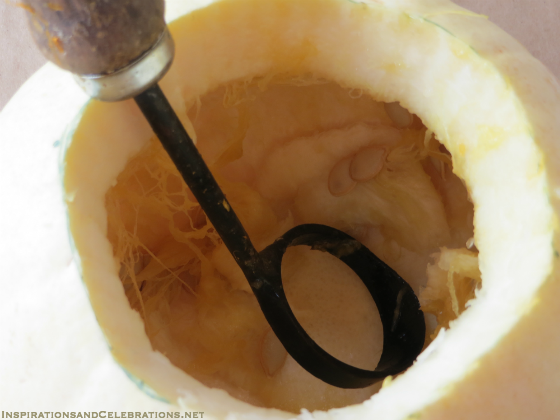
STEP 3: To clean-out the inside of the pumpkin, using a circle hoe (which is a hand-held gardening tool), scoop out the pumpkin seeds and flesh. The inside of the pumpkin should look smooth and fully cleaned-out after this process, so that it has a flat, clean surface for you to place a candle votive inside (after you are done pumpkin carving).
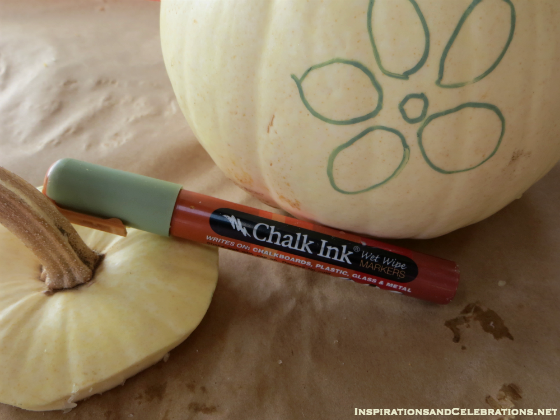
STEP 4: To help you more easily carve beautiful designs, start by drawing your design on the pumpkin using the chalk marker. Simple shapes (like flowers or stars) are best when just learning how to carve pumpkins. As you become more skilled at pumpkin carving, you can advance to more intricate designs and patterns.
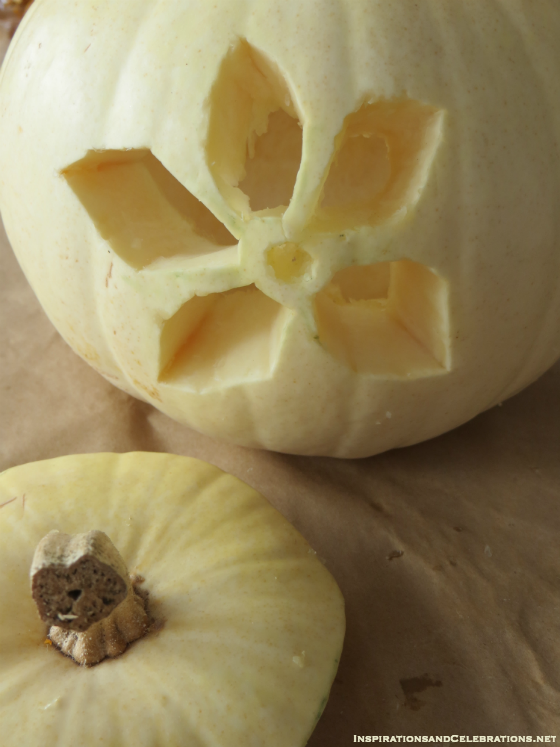
STEP 5: Using the paring knife or pumpkin carving tool, carefully cut out your design. Make sure to shave the inside of the cut-outs so that they look smooth and ridge-free.
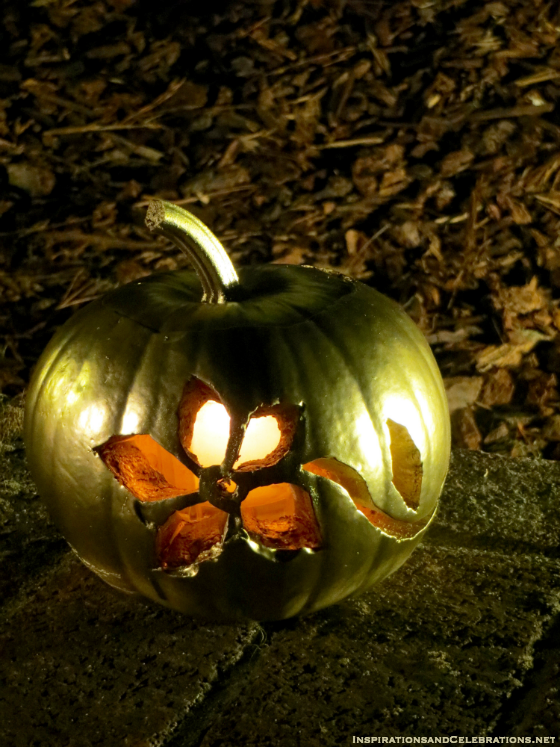
When you are done pumpkin carving, to display your pumpkin, simply place a small unscented tealight candle in a glass votive holder inside the base of the pumpkin. Light the candle, put on the top lid of the pumpkin, and place outside. Just remember to blow-out the candle before leaving your house or going to bed. Or, if you want to really play it safe (or have children in your home), it’s advisable to opt for a flameless battery-operated candle instead.
For more fabulous DIY Halloween Decor ideas, check out the Inspirations & Celebrations’ Glamorous Halloween Pumpkin Tutorial.
[Disclaimer: Affiliate links.]